Building a Development Environment on Raspberry Pi
Building an environment for development on Raspberry Pi
Developing on Raspberry Pi
For years, I’ve eyed those tiny Raspberry Pi computers sitting on store shelves, wondering when I’d finally have a compelling reason to dive in. That moment came when I decided to build a proper Kubernetes development environment without the hefty cloud bills that come with running clusters on Azure or AWS.
If you’re unfamiliar with Raspberry Pi, think of it as a credit-card-sized computer that costs around \(35-\)75 depending on the model. Despite their diminutive size, these little powerhouses pack enough computing muscle to run real workloads. They’re energy-efficient, whisper-quiet, and perfect for learning infrastructure concepts without breaking the bank.
My goal was ambitious but clear: connect multiple Raspberry Pi units into a multi-node Kubernetes cluster capable of running containerized applications just like you would in production. This wouldn’t be a toy environment; I wanted something robust enough to develop and test real applications, including this blog you’re reading right now.
Why Choose Raspberry Pi Over Cloud Services?
Before diving into the technical implementation, it’s worth examining why you’d choose Raspberry Pi hardware over the convenience of managed cloud services. The decision isn’t just about cost. It is about learning, control, and the kind of engineering experience you want to gain.
The Compelling Advantages
Cost-Effective Learning Without Limits Let’s talk money. A three-node Raspberry Pi cluster costs roughly \(300-400 upfront, including power supplies, networking gear, and a case. Compare that to running a similar setup on AKS or EKS, where you might burn through \)200-500 per month in compute costs alone. After just a couple months, your Raspberry Pi cluster has paid for itself and there are no ongoing bills, no surprise charges for data transfer, and no anxiety about forgetting to shut down instances.
True Hardware Control When you own the physical hardware, you control everything. Want to experiment with different networking topologies? Go ahead. Need to test storage configurations? You can swap USB drives, add SSDs, or try different mount options without worrying about cloud provider abstractions or hitting quota limits. This level of control is invaluable when you’re trying to understand how systems really work under the hood.
Deep, Hands-On Infrastructure Experience Managed Kubernetes services abstract away much of the complexity, which is great for production but not always ideal for learning. With Raspberry Pi, you’ll wrestle with real networking challenges, configure storage volumes from scratch, and troubleshoot kernel modules. You’ll SSH into nodes, inspect network interfaces, and debug DNS resolution issues. This hands-on experience builds intuition that no amount of documentation can provide.
24⁄7 Development Environment Your cluster sits on your desk or shelf, always available, always yours. No need to spin up cloud resources when you want to experiment at 2 AM. No need to tear them down when you’re done. The cluster is just… there, ready whenever inspiration strikes.
Energy Efficiency and Sustainability Each Raspberry Pi consumes about 5-15 watts under load, roughly equivalent to a night light. Your entire three-node cluster uses less power than a single incandescent bulb. Running it 24⁄7 costs only a few dollars per month in electricity, and you can feel good knowing your learning lab has a minimal environmental footprint.
Surprisingly Portable The entire cluster, including networking gear and power supplies, fits in a small case or backpack. Taking your Kubernetes environment to a conference, meetup, or friend’s house is actually feasible. Try doing that with cloud infrastructure.
The Honest Disadvantages
Resource Constraints Are Real Raspberry Pi 4B and 5 models typically max out at 8GB of RAM, and their ARM processors, while capable, are no match for modern server CPUs. You won’t be running intensive data processing workloads or training machine learning models. Complex applications with heavy resource requirements will quickly bump up against these limits.
ARM Architecture Challenges The computing world still heavily favors x86/AMD64 architecture. Many Docker images you pull from Docker Hub simply won’t work on ARM-based Raspberry Pis. You’ll often need to find ARM64-compatible alternatives, build multi-arch images yourself, or spend time debugging why something that “should just work” doesn’t. It’s educational, but sometimes frustrating.
You’re Your Own SRE No managed service means no support team. When something breaks - and it will - you’re on the hook to fix it. Cluster updates, security patches, backup strategies, and hardware failures are all your responsibility. This is fantastic for learning but can be time-consuming when you just want to write code.
Home Network Dependencies Your cluster is only as reliable as your home internet and power. No enterprise-grade redundancy, no geographic distribution, no DDoS protection. If your power goes out or your router hiccups, your cluster goes down. Cloud providers offer SLAs; your Raspberry Pi cluster offers… character-building experiences.
Limited Scaling Options Scaling horizontally means buying more hardware and physically configuring it. In the cloud, you’d just adjust a slider or update a configuration value. With Raspberry Pi, you’re making another trip to the electronics store and spending an evening running cables.
Storage Performance Limitations SD cards and USB storage are significantly slower than the NVMe SSDs backing cloud infrastructure. I/O-intensive applications will feel sluggish, and you’ll quickly develop an appreciation for the storage performance cloud providers take for granted.
The Verdict for Development
For my use case, building and testing cloud-native applications, learning Kubernetes deeply, and iterating on infrastructure-as-code the advantages overwhelmingly outweigh the disadvantages. I can experiment freely, break things spectacularly, and learn from my mistakes without watching a cost meter tick upward. When it’s time to deploy to production, I’ll use a managed service. But for development and learning? Raspberry Pi all the way.
Building the Cluster: Technical Implementation
Now for the fun part, the actual build. I won’t replicate the excellent step-by-step guides already available (particularly this comprehensive post by Anthony Simon). Instead, I’ll focus on my specific choices, the challenges I encountered, and the lessons learned along the way.
The Hardware Stack
My cluster consists of three Raspberry Pi units with a somewhat unconventional mix:
- 1 Raspberry Pi 5 (4GB RAM) - Designated as the control plane node
- 2 Raspberry Pi 4B (8GB RAM) - Serving as worker nodes
This configuration came about because I already owned the Pi 5 and didn’t want it collecting dust. While most guides recommend using identical hardware for consistency, mixing generations turned out to be educational in ways both good and frustrating.
The Pi 5 Complication: The newer Pi 5 doesn’t support Power over Ethernet (PoE) hats yet, which meant I couldn’t power it through the network switch like the Pi 4B units. This necessitated an additional power cable running from the wall outlet. Not elegant, but functional. The benefit? The Pi 5’s improved performance makes it well-suited for control plane duties, which can be more CPU-intensive than worker nodes.
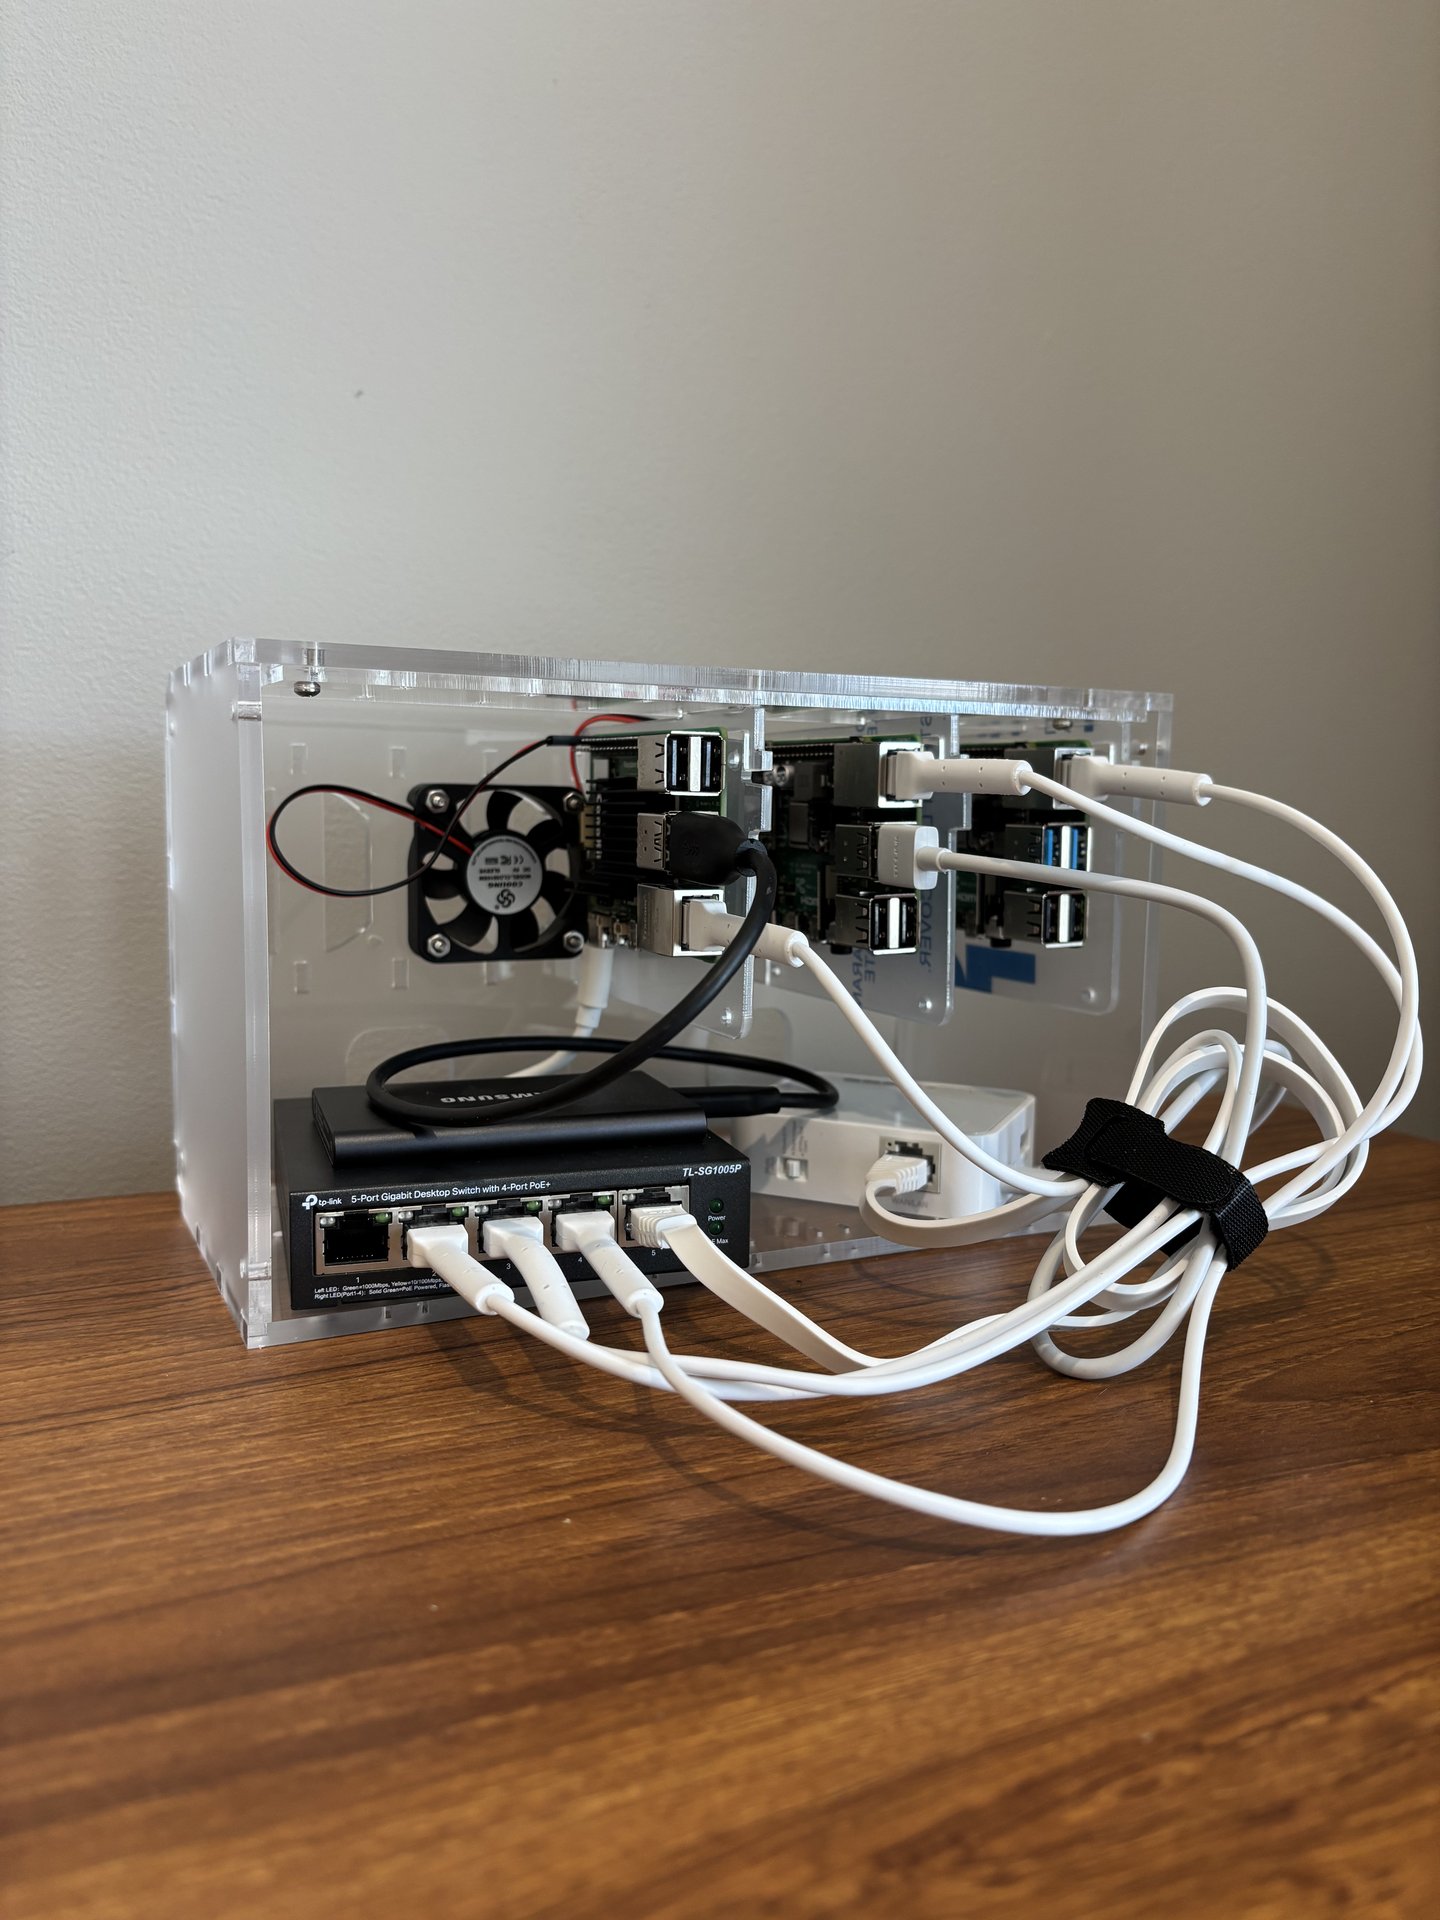
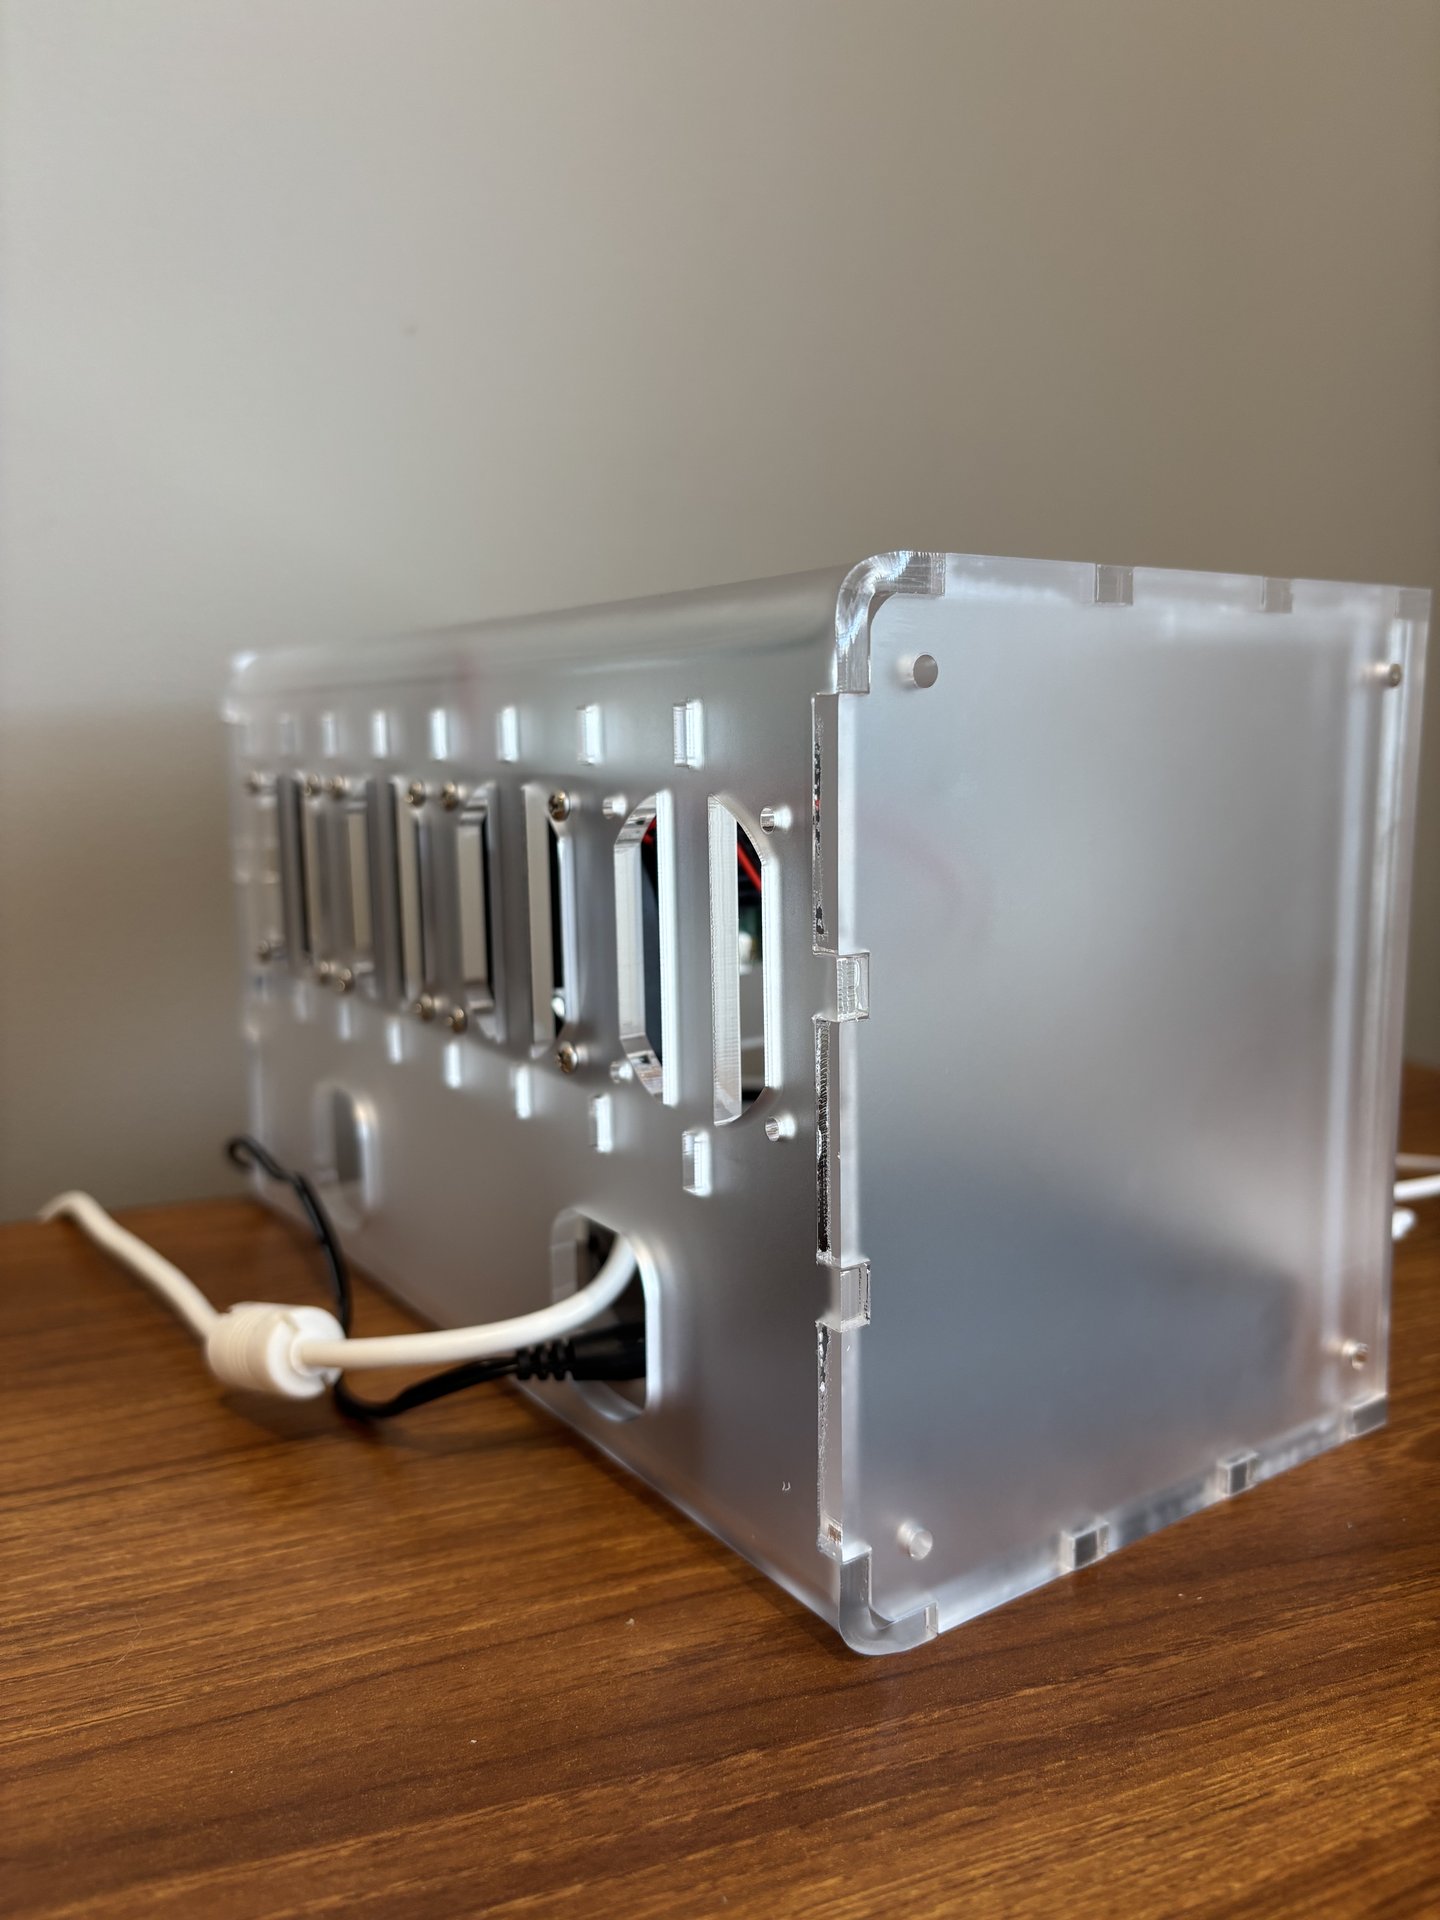
Housing Everything: I opted for a Cloudlet cluster case, which provides mounting for three Raspberry Pis, a network switch, and includes surprisingly effective cooling fans. The case keeps everything organized and stackable, though cable management becomes an art form when you’re dealing with power cables, ethernet connections, and USB devices. Pro tip: label everything before you mount it.
Component Cost Breakdown:
- 3x Raspberry Pi units: ~$200-250
- Cloudlet cluster case: ~$60
- Network switch (5-port): ~$20
- Power supplies: ~$40
- MicroSD cards: ~$30
- Miscellaneous cables: ~$20
- Total: Approximately $370-420
The fans included with the case work surprisingly well, keeping all three units cool even under load. The Pi 5’s different board layout and header placement required some creative mounting, but it ultimately fit just fine. Here are pictures of the finished product.
Network Architecture
One of the most important decisions was how to structure the network. I wanted isolation for security and experimentation purposes, but also needed internet access for pulling container images and packages. The solution? A two-tier network setup.
The Topology:
- Home Network (192.168.1.x) - My regular home router and devices
- Cluster Network (10.0.0.x) - Isolated network for the Kubernetes cluster
- Bridge: A small travel router connecting both networks
This configuration provides several benefits:
- Isolation: The cluster operates in its own subnet, meaning experiments or misconfigurations won’t affect my home network devices
- Internet Access: The travel router bridges to my home network, allowing nodes to reach the internet for updates and container images
- Portability: I can disconnect the entire cluster (case, router, and all) and set it up elsewhere without reconfiguring IP addresses
- Security: The cluster isn’t directly exposed to my home network or the internet, all traffic flows through the bridge router
Access Pattern: I SSH into the control plane node through the travel router’s IP, then jump to worker nodes from there. Once kubectl is configured, I can manage everything from my laptop without needing direct access to each node.
The downside? One more device to power and manage. But the security and flexibility make it worthwhile, especially when experimenting with networking configurations that could otherwise bring down your home WiFi.
Kubernetes Configuration
With hardware assembled and networking configured, it was time to actually build the cluster. The topology was straightforward given my hardware mix: - Control Plane: Raspberry Pi 5 (4GB RAM) - Worker Nodes: 2x Raspberry Pi 4B (8GB RAM each)
Why MicroK8s?: I evaluated several Kubernetes distributions: K3s, K0s, and MicroK8s before settling on MicroK8s. The decision came down to three factors:
- Native Ubuntu Integration: MicroK8s is maintained by Canonical and installs cleanly on Ubuntu Server
- Minimal Overhead: It’s lightweight enough for Raspberry Pi while still providing a full Kubernetes experience
- Add-on Ecosystem: Built-in add-ons for DNS, storage, dashboard, and other essentials make setup faster
The initial setup was surprisingly painless. After flashing Ubuntu Server 64-bit onto each Pi’s microSD card and running through basic configuration (hostname, SSH keys, static IPs), installing MicroK8s took a single command on each node:
sudo snap install microk8s --classic
Joining the worker nodes to the control plane was equally straightforward; the control plane generates a join token, you run one command on each worker, and within seconds you have a functioning cluster. Running microk8s kubectl get nodes and seeing all three nodes ready was genuinely exciting.
The Reality Check: While the happy path worked smoothly, I did encounter ARM architecture issues when pulling certain container images. Some images I wanted to use simply didn’t have ARM64 builds available. This forced me to either find alternatives, build multi-architecture images myself, or modify applications to work with ARM-compatible dependencies. Frustrating in the moment, but valuable experience for understanding cross-platform compatibility.
Persistent Storage: The Real Challenge
Here’s where things got interesting. By default, Kubernetes storage is ephemeral, restart a pod and any data it wrote disappears. This is fine for stateless applications but completely unworkable for databases, file uploads, or anything that needs to persist data between deployments.
The cloud-native solution would be to use cloud storage (Amazon S3, Azure Blob Storage, etc.), but I wanted to keep everything local. Enter the Samsung T7 1TB Portable SSD, a compact USB drive that provides fast, reliable storage for about $100.
The Setup: I connected the T7 to the control plane node’s USB 3.0 port and configured it as a mount point at /mnt/persistent-storage. This sounds straightforward, but getting it working reliably required several steps:
- Formatting: The drive needed to be formatted with ext4 filesystem for proper Linux permissions
- Auto-mounting: Editing
/etc/fstabto ensure the drive mounts automatically on boot, using UUID-based identification to handle potential device name changes - Permissions: Setting appropriate ownership and permissions so Kubernetes pods could read/write to it
- Testing: Simulating reboots and pod restarts to ensure data actually persisted
The command line kung-fu involved commands I rarely use: blkid to get UUIDs, mkfs.ext4 for formatting, mount with specific options, and careful editing of system files where one typo could prevent the system from booting.
Kubernetes Integration: Once the physical drive was configured, I created a PersistentVolume (PV) and PersistentVolumeClaim (PVC) in Kubernetes:
apiVersion: v1
kind: PersistentVolume
metadata:
  name: local-storage
spec:
  capacity:
    storage: 900Gi
  accessModes:
    - ReadWriteOnce
  hostPath:
    path: /mnt/persistent-storage
With this in place, any pod can request persistent storage by referencing the PVC. I tested it with a PostgreSQL instance: deployed the database, inserted test data, deleted the pod, recreated it, and confirmed the data was still there. Success!
Trade-offs: This approach ties the storage to a specific physical node (the control plane), which isn’t ideal for high availability. If that node goes down, applications can’t access their data until it comes back up. In production, you’d use distributed storage solutions like Ceph or Longhorn. But for development? A single USB drive is simple, fast, and gets the job done.
Deployment Infrastructure and Automation
With the cluster operational and storage configured, it was time for the real test: deploying actual applications. I started with this blog as a guinea pig. It’s relatively simple but representative of real-world applications with containers, configuration, and persistent data.
Infrastructure as Code: Rather than manually running kubectl apply commands each time, I built a proper deployment pipeline. Check out the ./deploy directory in the blog’s GitHub repository to see the full structure, but here’s the overview:
deploy/
├── manifests/          # Kubernetes YAML definitions
│   ├── deployment.yaml # Pod specifications and replicas
│   ├── service.yaml    # Internal cluster networking
│   ├── configmap.yaml  # Configuration settings
│   └── ingress.yaml    # External access routing
├── scripts/            # Automation scripts
│   ├── build-image.sh  # Build ARM64 Docker images
│   ├── deploy.sh       # Full deployment pipeline
│   └── rollback.sh     # Quick rollback capability
└── configs/            # Environment-specific configs
    ├── dev.env
    └── prod.env
The Docker Complications: Building container images for ARM64 architecture required modifying my Dockerfile and build process. The docker buildx command with --platform linux/arm64 became essential. Some dependencies needed ARM-specific base images, which meant tracking down ARM-compatible alternatives for Node.js, Go, and system libraries.
Makefile Magic: I created a Makefile to orchestrate the entire deployment workflow:
make build        # Build ARM64 Docker image
make push         # Push to Docker Hub
make deploy       # Apply Kubernetes manifests
make health-check # Verify deployment succeeded
Is Kubernetes overkill for a simple blog? Absolutely. But the skills and scripts I developed here translate directly to more complex projects. The investment in automation pays dividends when you’re deploying microservices, databases, and monitoring stacks.
The First Successful Deployment: Running make deploy-full and seeing the blog come up in my browser served from my own hardware was incredibly satisfying. No cloud provider, no monthly bill, just three Raspberry Pis humming quietly on my desk.
Lessons Learned and Real-World Observations
After several months of running this cluster for development, here are the insights I wish I’d known upfront:
What Worked Better Than Expected:
- Stability: The cluster has been remarkably stable. Uptime is limited primarily by intentional experimentation and occasional power outages, not hardware failures
- Performance: For development workloads, the performance is entirely adequate. Build times are reasonable, and application response times match what I’d see in the cloud
- Learning Value: The hands-on experience has been invaluable. I’ve learned more about networking, storage, and Kubernetes internals in three months than in years of using managed services
- Cost Savings: After the initial investment, my monthly “infrastructure costs” are about \(3 in electricity versus \)200+ for comparable cloud resources
Unexpected Challenges:
- ARM Image Availability: More packages support ARM64 now, but you’ll still encounter images that don’t. Budget extra time for this
- SD Card Failures: MicroSD cards eventually fail. I learned to keep backups and consider them consumables rather than permanent storage
- Heat Management: Under sustained load, heat becomes a concern even with fans. Monitor temperatures and ensure adequate ventilation
- Network Debugging: Without cloud provider tools, network issues require old-school debugging: tcpdump, ping, traceroute, and patience
Would I Do It Again?: Absolutely, without hesitation. The combination of hands-on learning, cost savings, and always-available infrastructure makes this one of the best investments I’ve made in my technical education.
Conclusion: The Best Development Investment I’ve Made
Building a Kubernetes cluster on Raspberry Pi hardware isn’t just about saving money on cloud bills though that $200-500/month savings is certainly nice. It’s about fundamentally changing your relationship with infrastructure from abstract cloud concepts to physical systems you can see, touch, and truly understand.
The Learning Is Worth the Effort: Every challenge I encountered from ARM architecture compatibility, storage configuration, network isolation, etc. taught me something valuable. In the cloud, these problems are either abstracted away or solved with a configuration checkbox. On bare metal, you’re forced to understand the underlying mechanisms. That understanding makes you a better engineer, whether you’re deploying to Raspberry Pi or managing cloud infrastructure at scale.
It’s a Real Development Environment: This isn’t a toy or a learning simulation. The blog you’re reading right now was developed and tested on this cluster. I’ve deployed databases, caching layers, and monitoring stacks. I’ve simulated node failures, tested backup and restore procedures, and experimented with different networking configurations. When I eventually deploy applications to production cloud environments, I do so with confidence because I’ve already worked through the difficult parts on my own hardware.
The Economics Make Sense: The $370-420 initial investment paid for itself in two months compared to equivalent cloud infrastructure. But beyond direct cost savings, there’s something liberating about experimenting without watching a cost meter. Want to leave the cluster running 24x7? Go ahead. Want to deploy ten services just to see how they interact? No problem. Want to break things and rebuild from scratch? The only cost is your time.
The Tactile Satisfaction: There’s something deeply satisfying about building and managing physical hardware. The gentle hum of cooling fans, the blinking network lights, the ability to walk over and see your cluster running it creates a connection to your work that purely virtual infrastructure can’t match.
For Whom Is This Worthwhile?: This approach isn’t for everyone. If you just want to deploy applications and don’t care about infrastructure internals, stick with managed services. But if you’re:
- Learning Kubernetes and want deep, hands-on experience
- Building side projects without recurring costs
- Developing DevOps or SRE skills
- Teaching or demonstrating infrastructure concepts
- Or simply curious about how systems work at a fundamental level
…then a Raspberry Pi Kubernetes cluster might be one of the best investments you can make.
What’s Next: The cluster sits on my desk as a constant reminder that you don’t need expensive cloud infrastructure to build impressive things. Sometimes, $400 worth of Raspberry Pis and the willingness to dig into how things really work is all you need.
If you’re considering building your own cluster, I encourage you to take the plunge. The learning curve is real, but the rewards in knowledge, capabilities, and cost savings make it absolutely worthwhile.
Resources and Next Steps:
- Anthony Simon’s Comprehensive Guide
- MicroK8s Documentation
- This Blog’s Deployment Scripts on GitHub